Gear How-to – Benro Polaris Astro Setup
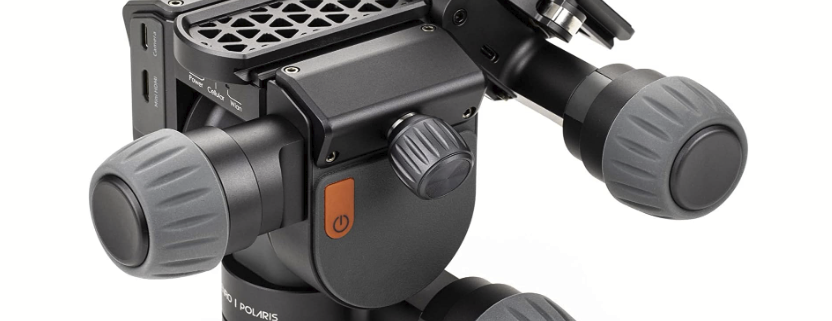
The Benro Polaris Astro is an amazing “smart” tripod head. I am very happy with the abilities of this amazing tool. When I purchased it, I discovered that that wasn’t a lot of information on the setup. The manual isn’t great, not unlike any other manual I’ve encountered. After many false starts and utter failures in setting it up, I figured out the steps required to properly align and use this fantastic tripod head.
This how-to specifically addresses the Astro function.

Once out of the Box
First, fully charge your Benro Polaris. You can use a USB-C cable that is plugged into a 19W (or better) wall plug-in adapter. Here’s an example. Plugging it into your computer to charge the battery may be problematic as the USB port may be under-powered to handle charging it. I find it is best to charge it via a proper outlet.
The green light flashes on the Benro Polaris while charging. When it is fully charged, the green light goes out. It may take several hours to fully charge.
While it is charging, download the app onto your phone.
Select a sturdy tripod to mount the Benro Polaris. If your tripod has a flat top plate like my Induro GIT-203, you will need a tripod spacer. This is the one I use. If your tripod doesn’t a flat top plate, you are good to go.
The Steps
It is important to level your tripod before mounting the Benro Polaris. If your tripod has a bubble level, use it to achieve the proper leveling. If not, you can use a leveling app or a physical bubble level. Although the Benro Polaris self-levels, I find that the better the foundation it has, the better the results.
Install the Benro Polaris. The tripod head can be mounted to a standard tripod with a 3/8″ screw.
Basics
The pecking order of steps is important for the Benro Polaris to properly track stars.
- Install the Astro module and connect the short USB-C cable by inserting it into the “Extra” port on the Astro Module and the Benro Polaris. These ports are clearly marked.
- The Benro Polaris is now ready to be powered on. The red power button should be tapped twice quickly. The trick is to hold down the power button on the second tap. Once you hear the triple beep, release the power button. The Benro Polaris will unfold.
- Open the Polaris app. Connect to your Benro Polaris. You may choose to assign a password at the initial setup.
- Once connected, quickly double-tap simultaneously on the two dots which are the joysticks. This will move the Benro Polaris to its home position.
- Install the camera. Make sure the camera is powered off and connect the camera to the Benro Polaris by using the appropriate cable.
- Turn on the camera.
- The app will display a message when the camera has a solid connection to the Benro Polaris and is turned on.
- Tap the camera icon at the top right corner of the app. The various functions will display (as below). Select the Astro function. The Astro function is greyed out if the Astro module is not connected to the Benro Polaris.

9. The calibration screen appears. Align your mobile device parallel to the edge of the Benro Polaris as shown in the app and tap “Start Calibration”.

Below, is a basic setup video using the Benro Polaris app. It demonstrates how to perform the calibration, navigate the shooting functions, and use the GOTO abilities of the app.
Two processed images from the sequence shot during the video above. Nikon Z9 with 80-400mm lens @ 400mm. ISO 500, f/5.6, 30 seconds for each frame. 40 images stacked with 10 dark frames. 20 minutes total exposure time. The first stacked in Sequator. Stretched and processed in Photoshop. The second, stacked and stretched in SiriL.


Notes
- Setting your camera to shoot RAW and small JPEG allows the image to be viewed via the Polaris app. It isn’t necessary but it is helpful.
- A WIFI-only tablet can be used.
- Firmware can be updated using a micro SD card. Download the firmware from Benro and follow their instructions to update the directly firmware from the memory card.
Full review of the Benro Polaris Astro 3-Axis Tripod Head
Full review of the Focus on Stars Filter
Taking photos and want to make them more compelling?
Art isn’t just for walls. Art is also to hold in one’s hands.
© Silvana Della Camera

 Silvana Della Camera
 Silvana Della Camera
 Silvana Della Camera

 Silvana Della Camera

Trackbacks & Pingbacks
[…] error and lots of misfires with alignment but now I have it down pat. I will be posting a detailed ,how-to to track stars in a future […]
[…] ,Gear How-To Benro Polaris Astro Tripod Head and Polaris App […]
[…] ,Gear How-To Benro Polaris Astro Tripod Head and Polaris App […]
Leave a Reply
Want to join the discussion?Feel free to contribute!