Long exposure photography – Hustle It Up
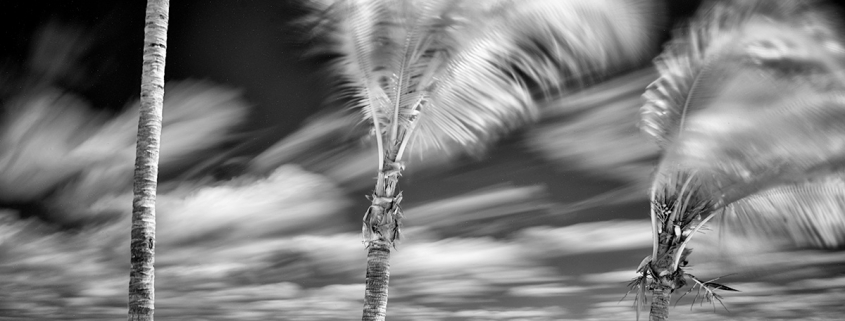
Night photography and ND filters require long exposures. Long exposure images are beautifully silky and visually rich. Clouds become soft and reveal the movement. Swaying trees become dreamy, and water becomes exquisitely glossy. However, they require experimenting with settings in order to get the exposure right. Sometimes it takes a good chunk of time to get it accurate. Problematic with a good dose of frustration.
Ever wonder if there was a way to get to the correct exposure faster?
High ISO Testing is the way to do it.

Nikon D800 Infrared @590nm | 241 seconds | 26 stop ND
So, what is it?
High ISO Testing is a technique that saves time in determining the correct exposure. Memorize the following sentence. Think about functionally what it means.
The number of seconds in a High ISO test exposure equals the number of minutes at the native ISO at the same aperture.*
There are three steps for this:
- Know your camera’s native ISO (aka base ISO).
- Add 6 stops of ISO to get to the testing ISO.
- This is the number of stops to go from a 1-second exposure to a 1-minute exposure.
Native ISO
What is the native ISO? It is the ISO your camera has which has the greatest dynamic range. Many cameras have a native ISO of 100, some ISO 200, my D850 has a native ISO of 64.
How do you find it? You can find it a few ways. Look at your camera, Dial down the ISO until you reach L01. Now dial back up to the next ISO. If it’s ISO 100 then your camera has a native ISO of 100. If however, your camera has ISO 200, then it has a native ISO of 200. You can check your manual too. Or check your camera maker’s website for specifications.
Now let’s do a little math. I will use native ISO 100 for this example.
Start at ISO 6400 to perform the test.
Why start at ISO 6400? You reach it by adding 6 stops of light to ISO 100. (step #2 above)
This is what I mean. Starting at ISO 100, double the ISO 6 times. Each time ISO is doubled, it equals 1 stop of light.
100 X 2 = 200 1 Stop
200 X 2 = 400 2 Stops
400 x 2 = 800 3 Stops
800 x 2 = 1600 4 Stops
1600 x 2 = 3200 5 Stops
3200 x 2 = 6400 6 Stops
Set the camera to ISO 6400 and a particular f stop (desired depth of field). Take a shot. Verify the histogram looks good. Use the chart below as a reference. Take note of the exposure time the camera shows.

If the exposure needed for ISO 6400 f/11 is 2 seconds, the exposure required using ISO 100 at f/11 will be 2 minutes.
If the exposure time needed for ISO 6400 f/11 is 3 seconds, the exposure required using ISO 100 at f/11 will be 3 minutes.
For cameras with a native ISO 200, simply double the values above. So you would start at ISO 12,800.
You get the idea.
Just be aware that this technique works best on native ISO exposures that are longer than a couple of minutes or so. Use it as a baseline and tweak the time up or down depending on the conditions of the scene.
Give it a spin.
*National Parks at Night
© Silvana Della Camera
 Silvana Della Camera
 Silvana Della Camera


 Silvana Della Camera
 Silvana Della Camera
Trackbacks & Pingbacks
[…] digital cameras see really well in the dark so this becomes a simple exercise in understanding the histogram. These steps are for photographing an astrolandscape in your backyard or in a dark location where […]
Leave a Reply
Want to join the discussion?Feel free to contribute!