All the Noise Noise Noise Noise…
Camera noise. It is the nature of high ISO but it’s nothing you need to be afraid of. You may actually stifle your photography by avoiding its use.
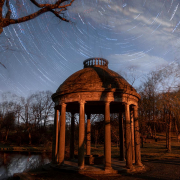
As an astrolandscape and infrared photographer, I can’t avoid noise. Infrared is a noisy medium even at low ISO. Astrolandscapes require fairly short exposures to avoid star trails from occurring which translates to using high ISO. (Read about getting pinpoint stars). There are many tools to diminish noise in post-processing. This is the reason you never need to cripple your photography because you fear using high ISO.
For the record, using low ISO is always desired as you have a greater dynamic range to work with, but it’s not always possible to use it. So, don’t worry about diving into the high ISO side of the pool.
Use the 3 step program
Step 1. Ignore the high ISO police. They are out there. Close your ears to their fear-mongering.
Step 2. Understand what noise actually is. Noise, or electronic noise, is randomness caused by your camera sensor and internal electronics. These introduce imperfections to an image. Scary right? Who wants imperfections in a perfect image?
Step 3. Use the tools. Learn the techniques. These mitigate the noise.
Food for thought: Jay Maisel, a master photographer and one of my all-time favorites, shoots at ISO 1600 as he walks about shooting street scenes. This is during daylight hours, not nighttime. If you are unfamiliar with his name, I guarantee you have seen his work.
Let’s look at the tools. There are many to choose from and they keep getting better. The use of AI (Artificial Intelligence) processing that software is incorporating into their tools is truly impressive. It does the job incredibly well. I am covering the most common ones here.

Adobe Camera Raw/Lightroom
These do a nice job on images that aren’t too noisy. Here’s an astrolandscape image, ISO 8000 using Adobe Camera Raw(ACR). I’ve zoomed in to show the noise and have positioned the developing pane down to the Detail section. Take note of the values on the first image and compare them to the second, while noting the noise in the image. The first image shows ACR default settings. I will use the sliders to diminish noise.
Nikon D780 | Nikon 14-24mm lens | ISO 8000 | f/2.8 | 6 seconds

By moving the color noise slider to the right, noise is diminished. Make sure to zoom in to roughly 100% before you adjust the sliders. The noise is lessened but it could be better. Beware the sledgehammer approach. If you overdo the slider, details are erased and the image will look soft.

You can do a similar noise reduction in the native software for your camera. Nikon’s NX Studio has an Astro denoise setting that works very well. Check out your camera maker’s native software and see how it reduces noise.
Topaz Denoise AI
This tool is amazing. Depending on the image, I may run it through Denoise AI before I do edits, or after.
I skip using any noise reduction in ACR and handle it completely in Topaz Denoise AI. I find that even the Topaz Sharpen AI tool does a fantastic job of removing noise while sharpening an image.
There are different types of noise reduction you can select. For night images, I select ‘Low Light’. In this mode, it handles stars very well. It doesn’t assume a tiny star is noise. Try the different options to determine what works best for the image. You can download it and play with it for free for 30 days.

DxO PureRAW 2
I recently got this tool. I downloaded it after I purchased DxO Nik 5. I am currently putting it through the paces. As I expand my testing, I will post an update. Like Topaz Denoise AI it uses artificial intelligence to eradicate noise in a raw file.
It’s a super easy tool to use. Before you do any processing, you simply drop the raw file onto the program. It sniffs the metadata and determines the optical modules to use to remove noise.

If the equipment list looks good, click “save”. Next, right-click on the image (it is already checked off) and select “Process RAW photo to JPEG or DNG”.
A secondary screen pops up. As I will pull the processed image into ACR, I choose DNG.
These are the settings I have used. I do not stack images processed through DxO PureRAW 2 so I leave the DxO Optical Corrections turned on. Should I decide to stack the images, I would uncheck this setting. Leaving it on and stacking images will create a banding mess in the final image. Lens corrections made in any tool, not just DxO PureRAW 2, will create this problem.

It does its thing and I must say it did a beautiful job on the starry skies and the wood. On the sand, however, I see a tiny amount of funky artifacts scattered about. I think this tool will get better and better. It’s off to a fantastic start and I like it a great deal. Download it and use it for free for 30 days. See what it does on your RAW files.
n

Nik Dfine 2
This tool from DxO Nik Collection works quite well. It used to be my go-to denoise tool before using Topaz Denoise AI. I find Topaz does a much better job at assessing the scene and high ISO noise without losing the detail thanks to its AI modules.
If you have Nik and haven’t tried Dfine 2, give it a spin.

Is the thought of using high ISO holding you back?
How do handle noise reduction? Do you have a preferred method or tool? Let’s hear it in the comments.
© Silvana Della Camera
Post title inspired by Dr. Seuss, from “How the Grinch Stole Christmas”


 Silvana Della Camera
 Silvana Della Camera
 Silvana Della Camera


Leave a Reply
Want to join the discussion?Feel free to contribute!