
Alpaca Benro Polaris V2.0 – Traveling with a Mini PC

Here is the third installment of using the Alpaca Benro Polaris V2.0 (ABP). A mini PC offers portability and powerful applications anywhere you go, but unlike a laptop, which has a built-in battery, a source of portable power is required. This post specifically addresses setting up a mini PC to control the Benro Polaris in the field, using a travel router and tapping into a cell phone’s hotspot. There are many ways to power a mini PC. AC power is the easiest and most convenient, but there are other methods to power it when AC power is not an option. To install ABP, please refer to this post.
The following describes my goals, challenges, and solutions.

Quick Disclosure (Before We Get to My Compulsive Gear Opinions) This post may contain affiliate links to Amazon, Focus on Stars, LRTimelapse, and Benro. If you grab something through them, I might earn a small commission — basically charity for a gal who owns way too many tripods, still drops half of them in the field, and used to spend hours hunting for perfect focus in the dark. No extra cost to you..
As an Amazon Associate, I earn from qualifying purchases. Same deal with Focus on Stars (the diffraction filter that actually lets me nail focus instead of guessing), LRTimelapse (my only defense against total time-lapse disaster), and Benro (steady support for my wobbly existence). I only recommend stuff I actually buy myself and use… even if I use it poorly sometimes.
Your support helps fund more ridiculous experiments in the dark. High five (or whatever I can manage without knocking the camera over).
The Challenges of Location Setups
Computers need power. It doesn’t matter if it’s a powerful desktop computer, a laptop with a long-lasting battery, or a mini PC; they need juice. A night of star chasing could entail 4-6 hours or more. Beyond the Benro Polaris Astro, a tripod, and your camera, there are other gadgets to think about. It’s time to consider what you’ll need to set up properly for a successful night of imaging.
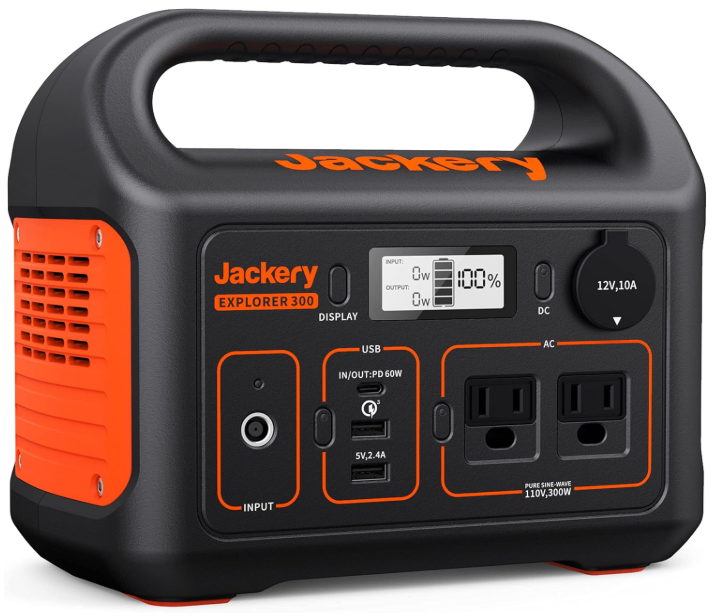
If you are driving to a location, things are a bit simpler. A portable unit, like this Jackery one, handles the power requirements for a night of shooting. Add a solar panel to charge it up, and you have power on the go. When flying to a destination, alternatives are in order. There are wattage limits for lithium batteries for air travel. You can’t pack your Jackery in your carry-on luggage.
What is Needed
Determine what your goals are for your travel setup. My requirements are probably different than yours, so consider your needs and adjust accordingly.
List Your Goals
It sounds lame, but making a proper list helps put the required pieces together. It helps prevent an important consideration from being missed. This list was the starting point for configuring my setup. I want to:
- Use my mini PC to control the Benro Polaris Astro using Alpca Benro Polaris, N.I.N.A for plate solving, PHD2 for guiding, and the option to use Stellarium Plus and Sky Safari Plus.
- Automatic GPS coordinates for the Benro Polaris/Alpaca Benro Polaris.
- Determine air-travel compliant power banks to power the mini PC, travel router, cell phone, 10″ tablet, and portable monitor.
- Accomplish at least 4 hours of imaging in one night.
For proper tracking, GPS coordinates are needed. Without access to the internet, you can add the coordinates manually, but I prefer have the Alpaca Benro Polaris read the GPS coordinates directly from the cell phone hotspot. I’d rather not stumble around in the dark trying to figure out the exact coordinates to type.
The Hardware to Power
- Mini PC – GMKtec Mini PC Gaming, K6 AMD Ryzen 7 7840HS Windows 11 PRO
- My mini PC, like many others, can be powered by a power bank. The challenge is figuring out which battery can power it for a night of astronomy. For the most part, it isn’t as easy as just plugging it into a robust power bank. Fanless units tend to be easier since they are low-power units, but not everyone chooses these units (like me).
- A portable touchscreen monitor – touch screens negate the need for a physical keyboard and mouse. Do you need a monitor? Yes. Without one, you are unable to troubleshoot issues with the mini PC if you can’t access it via Remote Desktop.
- Samsung 10″ Tablet – For Sky Safari Plus, Stellarium Plus, and access to the mini PC using Remote Desktop.
- Once the mini PC is up and running, the tablet can become the main driver via Remote Desktop (now called Windows App on mobile devices), and the monitor can be switched off.
- Travel Router – creates a local area network through which the various devices can communicate.
- As an Android user, communications between devices using the same hotspot are difficult, if not impossible. Remote desktop from my phone or tablet to the mini PC won’t work. Although a cell phone’s hotspot can be used by multiple devices simultaneously, they can’t “see” each other. This is where a router comes in handy. The router is connected to the phone’s hotspot as a client, and the devices, in this case, the mini PC, the tablet, and any other device that needs WiFi, all connect to the router’s access points. Now they can access the internet and communicate with each other, allowing me to connect to the mini PC using Remote Desktop or the Alpaca Pilot. A travel router eliminates this issue. Here’s an example of an inexpensive unit – TPLink Travel router. TPLink and GL.iNet are brands to look into. I own a Teltonika RUTM50 5G router and have set this up for on-the-road WiFi. All routers work pretty much the same. They take a single internet connection and share the signal with local devices. Follow the instructions for your specific unit.
The Cables and Power
It took a bit of digging, false starts, tangents, and misfires – especially with the cables – but here is the list of items I assembled that achieved the listed goals.
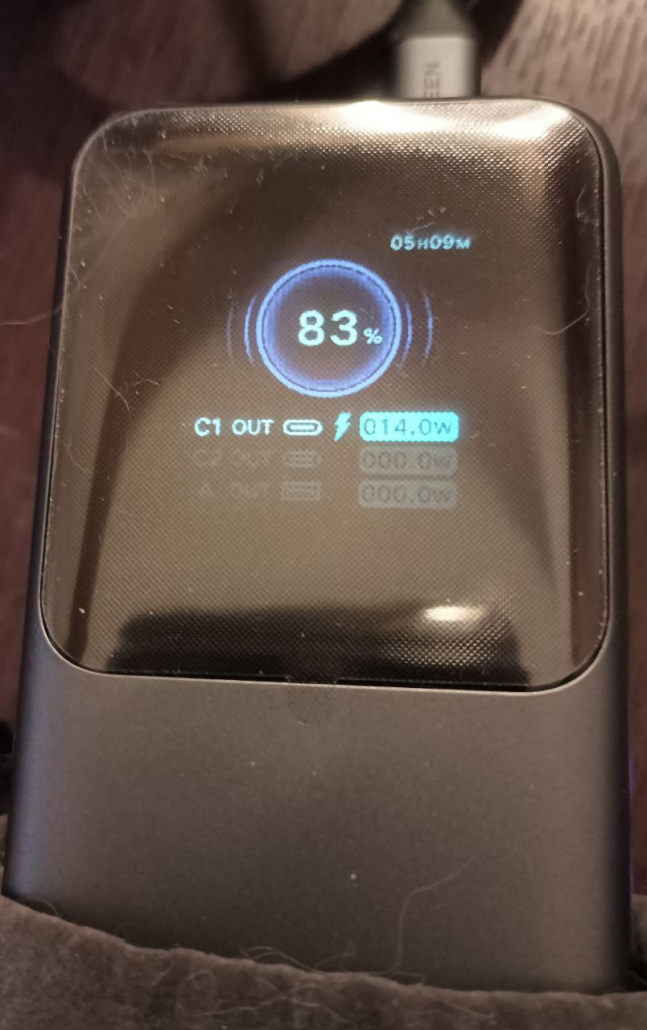
- UGREEN Nexode Power Bank 25000mAh 200W. This unit has a TFT display that is very helpful for checking the power draw on the battery. It can also be daisy-chained with another for continuous power, extending the run time. I bought two of them.
- UGREEN 140W USB-C – USB-C cable for the mini PC to power bank.
- USB-C to DC 20V 5.5×2.5mm PD 65W Emulator Trigger 90 Degree Angled Converter Adapter. This device helps keep the power bank from going to sleep and disconnecting from the mini PC. The mini PC draws varying amounts of power. To the power bank, this is translated to being “unstable”, and it shuts off. The emulator trigger keeps the power bank from thinking there is an issue with the mini PC and provides continuous power.
- UGREEN Power Bank 20000mAh 100W. This powers the portable monitor and is the backup power for the tablet and phone.
- Teltonika UPS – dedicated battery for the Teltonika router.
- USB-C to USB-A cables to connect my Nikon Z9 camera and a ZWO ASI 290mm mini camera to the mini PC for N.I.N.A. plate solving.
Things to Pay Attention To
Check the power specifications of your mini PC and other components in your kit. If it has a DC input jack, as mine does, what are the dimensions? I checked the manual and the GMKtec website for the dimensions; no specifics beyond the power specs were available. This was the challenging part of it all, figuring out the size of the DC port. Use Google search, DuckDuckGo AI, and even Amazon’s AI tool to find answers if you are having difficulties determining the exact power specs of your mini PC. Out of all of these sources, I got the best responses from Grok. There is a lot of misinformation to be had, and ironically, this caused the greatest challenges.
Devices that use USB-C tend to be easier to configure, but you still need to figure out the power requirements and the power banks that accommodate them.
If you have a good power bank, high-quality cables, and your mini PC doesn’t stay powered on after it boots up, look at your power settings.
For my mini PC, power management settings had to be adjusted in Windows. I adjusted the power settings to “Balanced”. Set the Sleep/Screen to “Never Sleep” when plugged in. Changed the Advanced Power Options to prevent Fast Startup and adjusted the Processor Power management to Mininum 5% and Maximum 98%. These tweaks, along with the emulator trigger, keep the mini PC powered up and running all my applications. I didn’t need to tweak the bios because the power mode was already set to Quiet by default.
Invest in good power banks. There are well-made, reliable ones and others that are complete junk out there. I find the UGREEN, Anker, Talentcell, and INIU brands to be reliable. Cables are important. Not all USB-C cables are for power delivery and are high quality.
Here’s a photo of the UGREEN 200W power bank TFT screen after running the mini PC for over an hour. The mini PC is running ABP, Alpaca Pilot, PHD2, and N.I.N.A. The Benro Polaris is also plugged in, getting power from the mini PC. A ZWO ASI 290mm mini guide camera is plugged in too. The TFT screen lets me know the remaining battery time and how much power is being drawn.
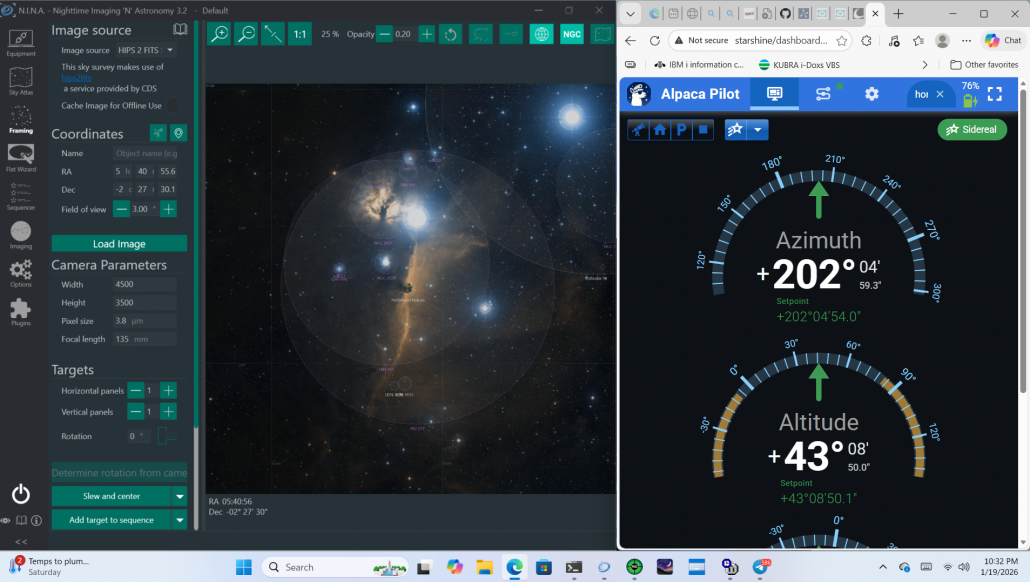
Here’s a screenshot of N.I.N.A and Alpaca Pilot on the mini PC on battery power.
It’s great to be untethered from an AC outlet. Running ABP on a mini PC with ASCOM software makes the mighty Benro Polaris Astro even more powerful.
What has been your experience with a mini PC? Do you have a favorite power bank? Let’s hear it in the comments.
Clear skies!
Alpaca Benro Polaris V2.0 First Look
Alpaca Benro Polaris V2.0 Installation
Night Shades – A Guide to Photography after Dark
Sights Beyond the Spectrum – An Infrared Photography Handbook
Master the Benro Polaris: The Ultimate Handbook for Photographers and Astrophotographers
© Silvana Della Camera
Join the Night Sky Newsletter
Exclusive astrolandscape tips, infrared secrets, and early workshop alerts.
To learn about upcoming workshops and tips on photography, consider subscribing to my website.
Taking photos and want to make them more compelling?
Art isn’t just for walls. Art is also to hold in one’s hands.
")


You are right about Benro Polaris with Alpaca driver . V2 version is perfect . Together a very pleasant , versatile , innovative solution for deep sky. My mini pc (Nipogi ) runs all night on a Ugreen 24000 mA ( without monitor )
Daniel
It truly is a delightful enhancement. Thank you for the note. It’s great to hear others are as delighted with V2.0 as I am!
Clear skies,