AstroWizard Review: The Free Tool That Makes Astrophotography Post-Processing Simple
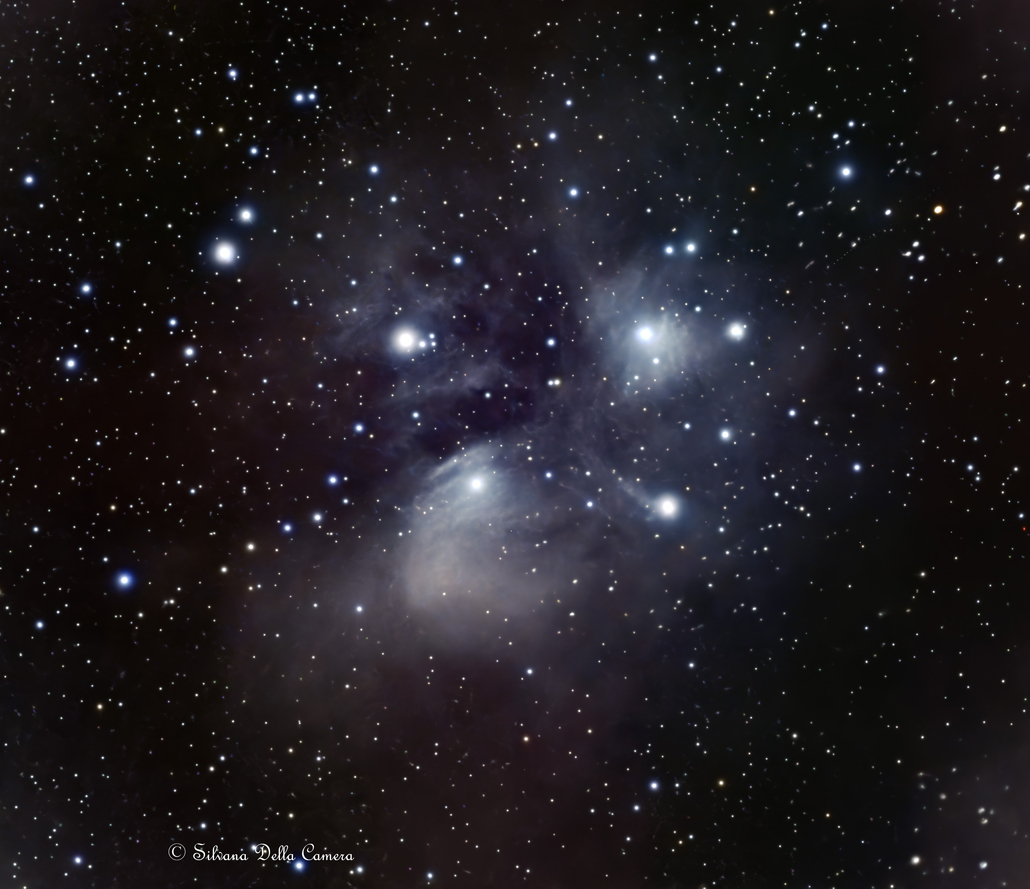
So, you have been bitten by the starlight bug. Astrolandscapes have initiated the itch for more starlight, perhaps you’ve successfully photographed the Orion Nebula or other deep-space objects with your camera gear. Or you have been imaging deep space objects with a telescope. You successfully capture and stack these jewels in the sky and then you discover that pulling out the object that is buried in the stack isn’t that easy nor straightforward. You quickly realize that the technical aspect of actually photographing the night sky was the simpler and by far more enjoyable part of astrophotography.
The irony.
It Ain’t Easy
There are excellent applications that post-process astro images. PixInsight and Siril are two of the go-to processing applications astrophotographers lean on for their images. They are powerful, do the job, and are not easy to use. The learning curve is substantial, and many people get disheartened with the process and end up losing interest in astrophotography. It often becomes a demoralizing adventure. It can take hours to process an image, and most of us don’t have the luxury of spending hours working on an image.
Enter AstroWizard. A brand new, free application that removes (more like rips off) the painful, steep learning curve and confusion of post-processing astrophotogaphy software, utilizing a clean, understandable 9-step process.
AstroWizard is an impressive application designed by Luke Newbould, an experienced astrophotographer who built AstroWizard using Claude AI to engineer the software. AstroWizard is a robust application, and I am incredulous at its power. To be clear, it is an application that anyone who images the night sky can use, from newbies to experienced.
This is the tool we all have been craving.
Your camera or telescope caught it. AstroWizard finishes it.
Load your stacked image, and AstroWizard provides prompts and guidance to quickly process an image.
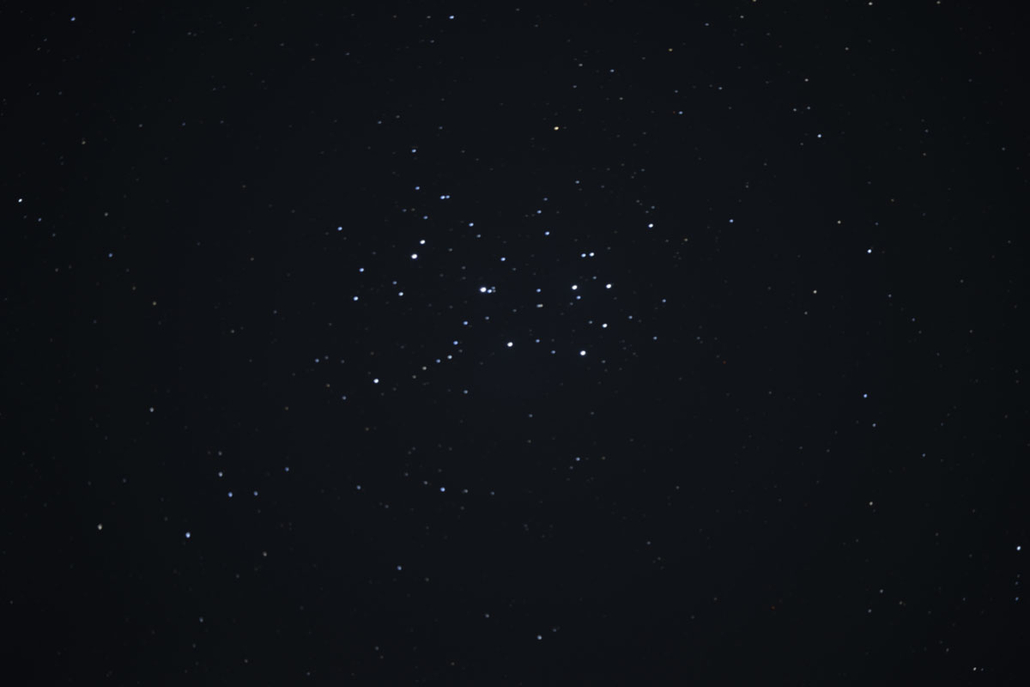
Here’s an image of the Pleiades from 2022. It’s a stacked image comprised of 40 light frames and 10 dark frames tracked with the Benro Polaris Astro. No edits applied after stacking in Sequator.
📷Nikon Z9 | [ ◉¯] Nikkor 80-400mm VR | ISO 500 | 𖣐 f/4.5 | ⏱️– 30 seconds |
This is the image after being processed through AstroWizard. It took about 10 minutes to process.
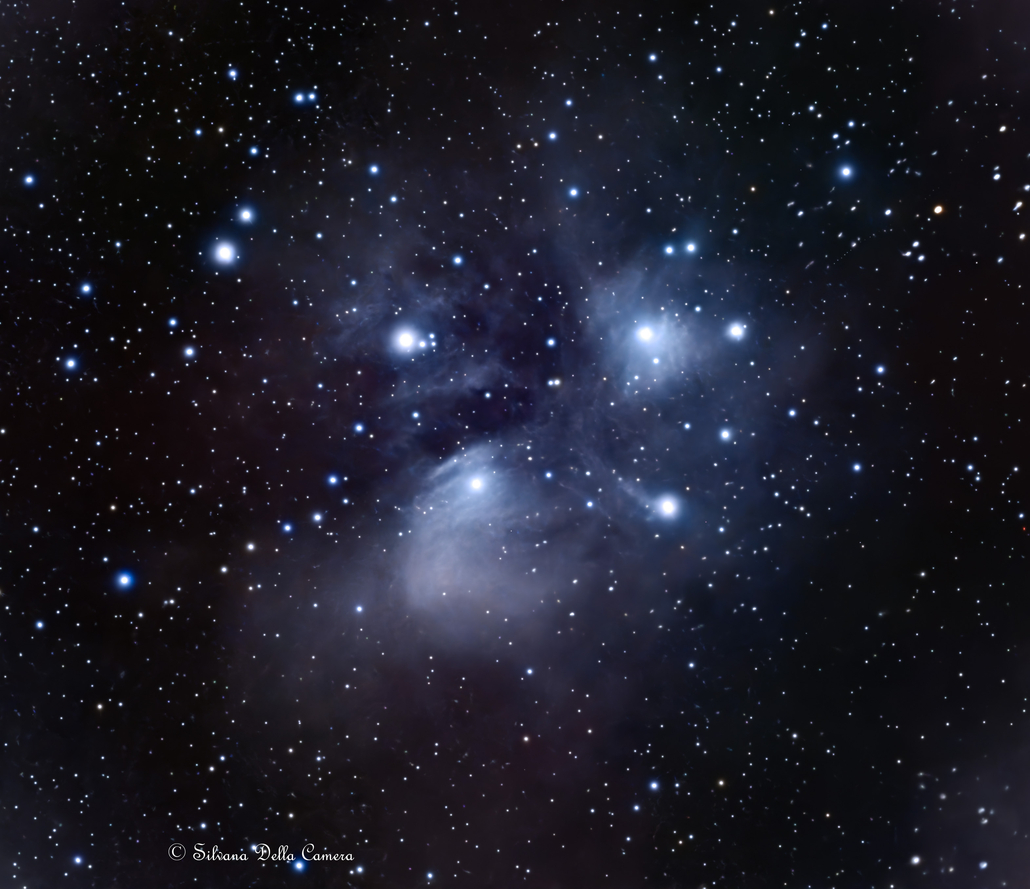
A stack of Orion (M42) tracked with a Benro Polaris Astro. The first is the unedited stack from Sequator. 40 light and 10 dark frames.
📷Nikon Z9 | [ ◉¯] Nikkor 80-400mm VR | ISO 500 | 𖣐 f/4.5 | ⏱️– 30 seconds |
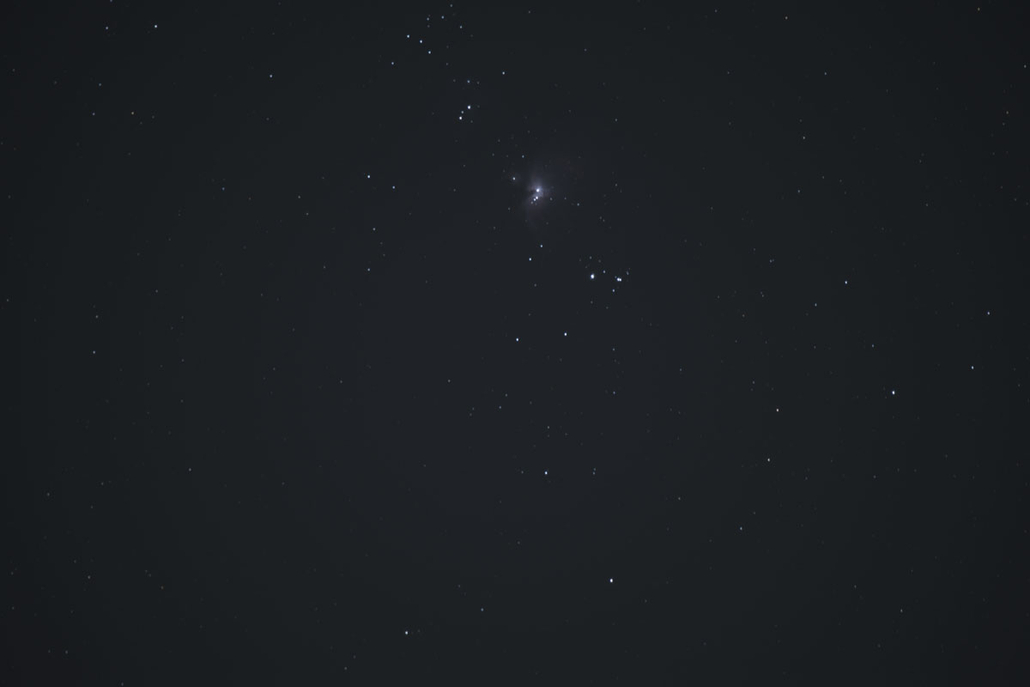
Processed using AstroWizard in just minutes.
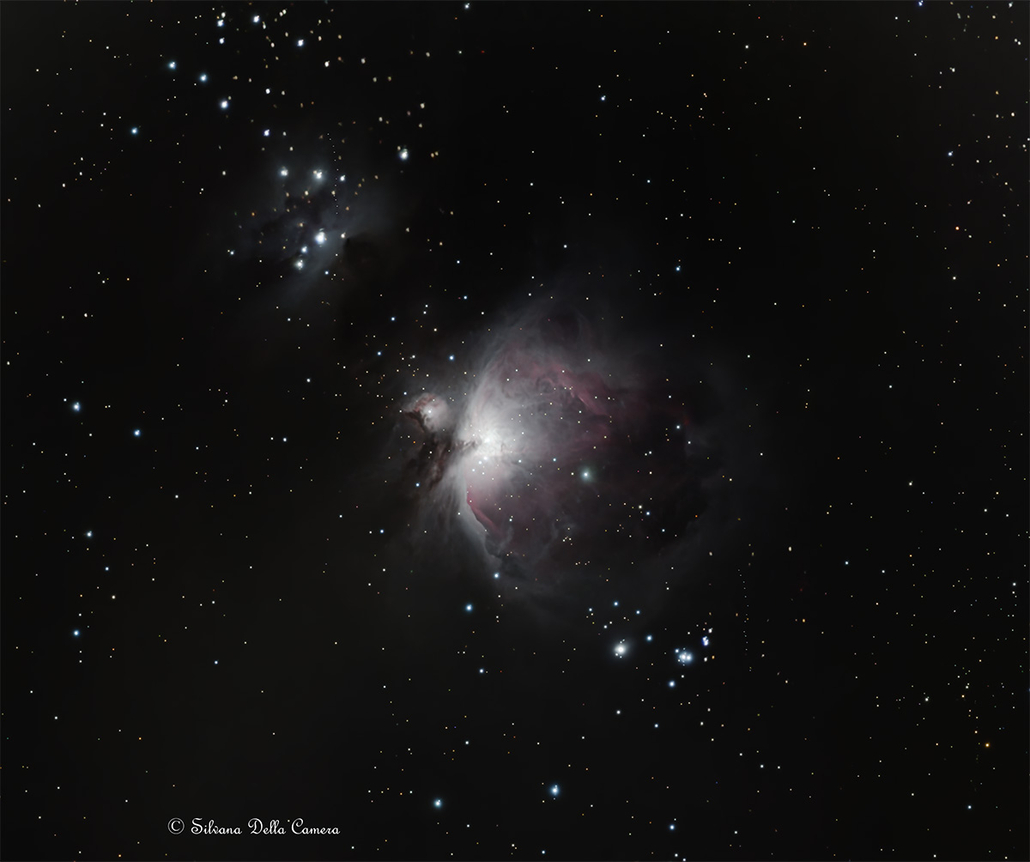
Yes, it’s that easy. It guides you along each step and provides information as you go along, so you actually learn the process and the terminology.
The application utilizes well-known tools used by the astrophotography community. You can install the free ones, such as GraXpert and StarNet, but you can also utilize the RC-Astro toolset. The application has buttons you simply click on to get to the tools you wish to use and also identifies the ones to download. My favorite is the RC-Astro toolset. It is a paid toolset, but you get to try it out for free for 30 days. I highly recommend you try RC-Astro out. If you already have a license for the plugin, download the stand-alone version from your account and install it. You are good to go.
So, How Easy is It?
I installed and configured AstroWizard, and successfully processed a stacked image before I went looking for videos about it. That’s how easy it is to use. When I first started my journey using PixInsight and Siril, I would stare at the applications blankly, not knowing exactly what to do first. I spent hours digging through the internet to learn how to do the first step, let alone understanding what the terms meant.
I won’t get into the setup; it’s very easy to do. Just read the screen and follow the instructions. Instead, I will show how easy it is to process a stacked Tiff. Luke has created excellent YouTube videos with detailed instructions on configuring and using the tool.
When you open AstroWizard, it prompts you to load your stacked image. It handles TIFF and FITS files.
If you have a smart telescope, like a Seestar, Dwarf, or any other brand that provides FITS files, you can also take these files and process the images yourself.
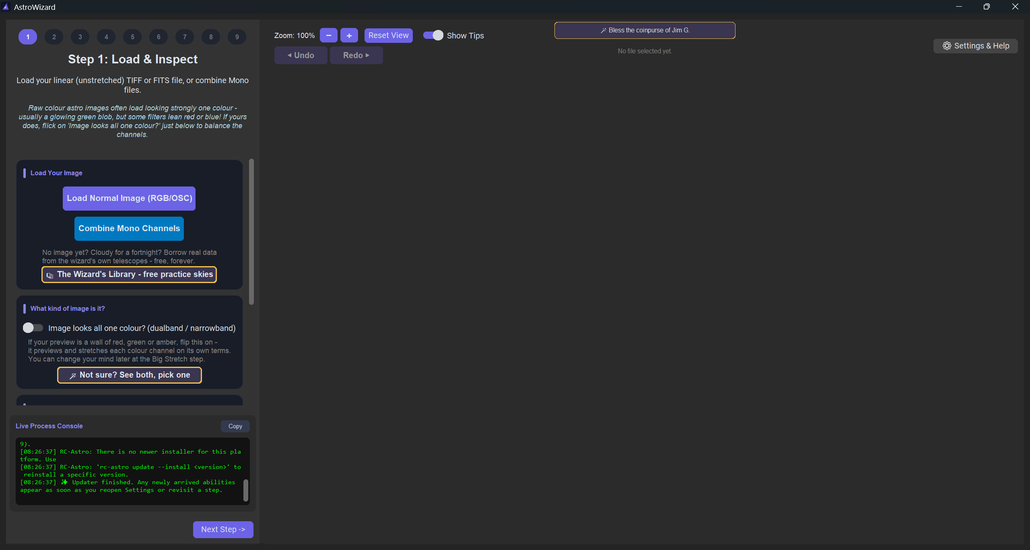
Step 1 – Load & Inspect
Click Load Normal Image (RGB-OSC) and navigate to the folder your image is in.
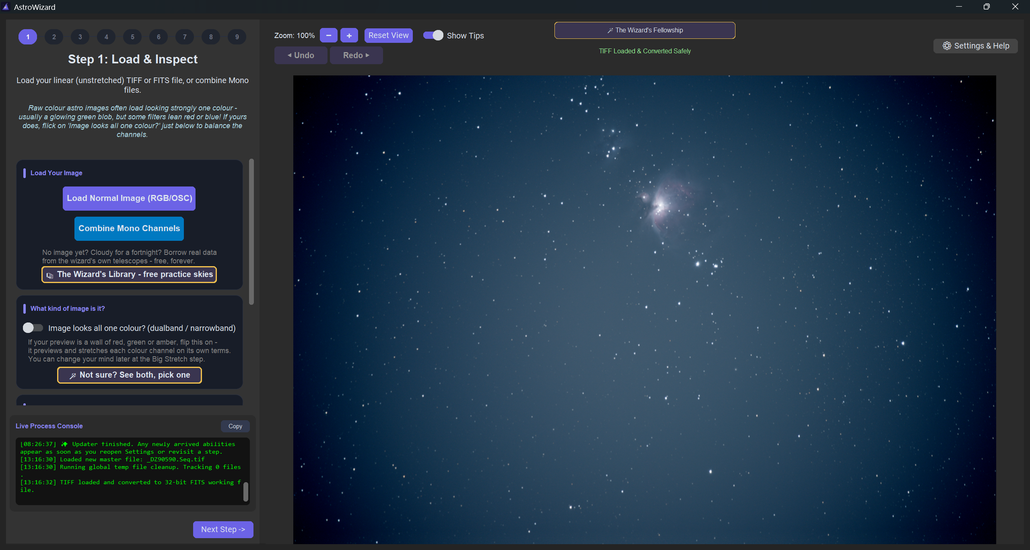
There is a console at the bottom left of the screen that relays feedback. It is helpful and a great way to learn what it is doing under the covers. Scroll through the prompt pane. You can’t make a mistake so don’t worry about clicking an incorrect option. You can undo and redo each step.
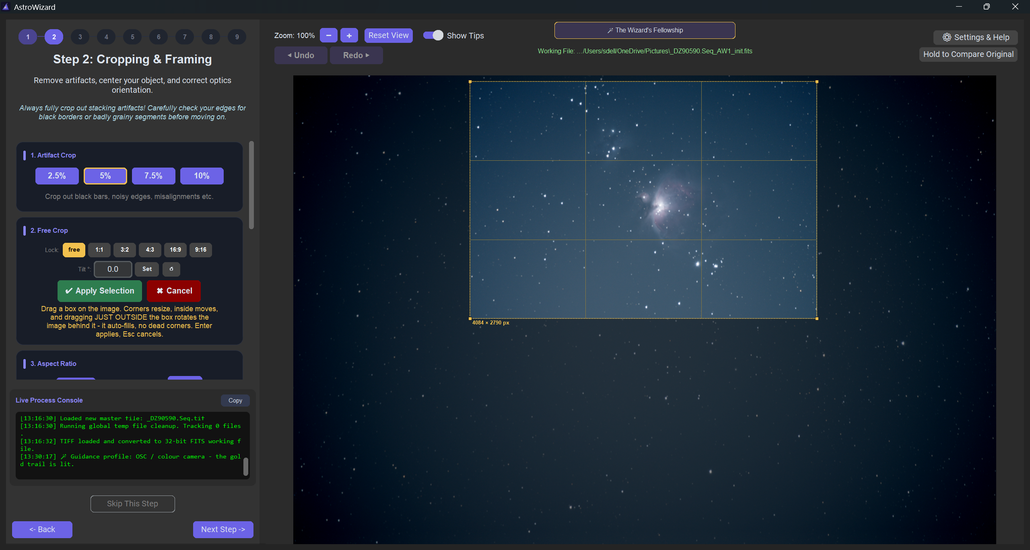
Step 2 – Cropping & Framing
It offers options to crop your image. Here, I selected “Free Crop”. You can drag the image or the selection square to adjust. Tapping Apply Selection crops the image. Once this (optional step) is complete, it tells you to go to the next step.
Step 3 – Background Extraction
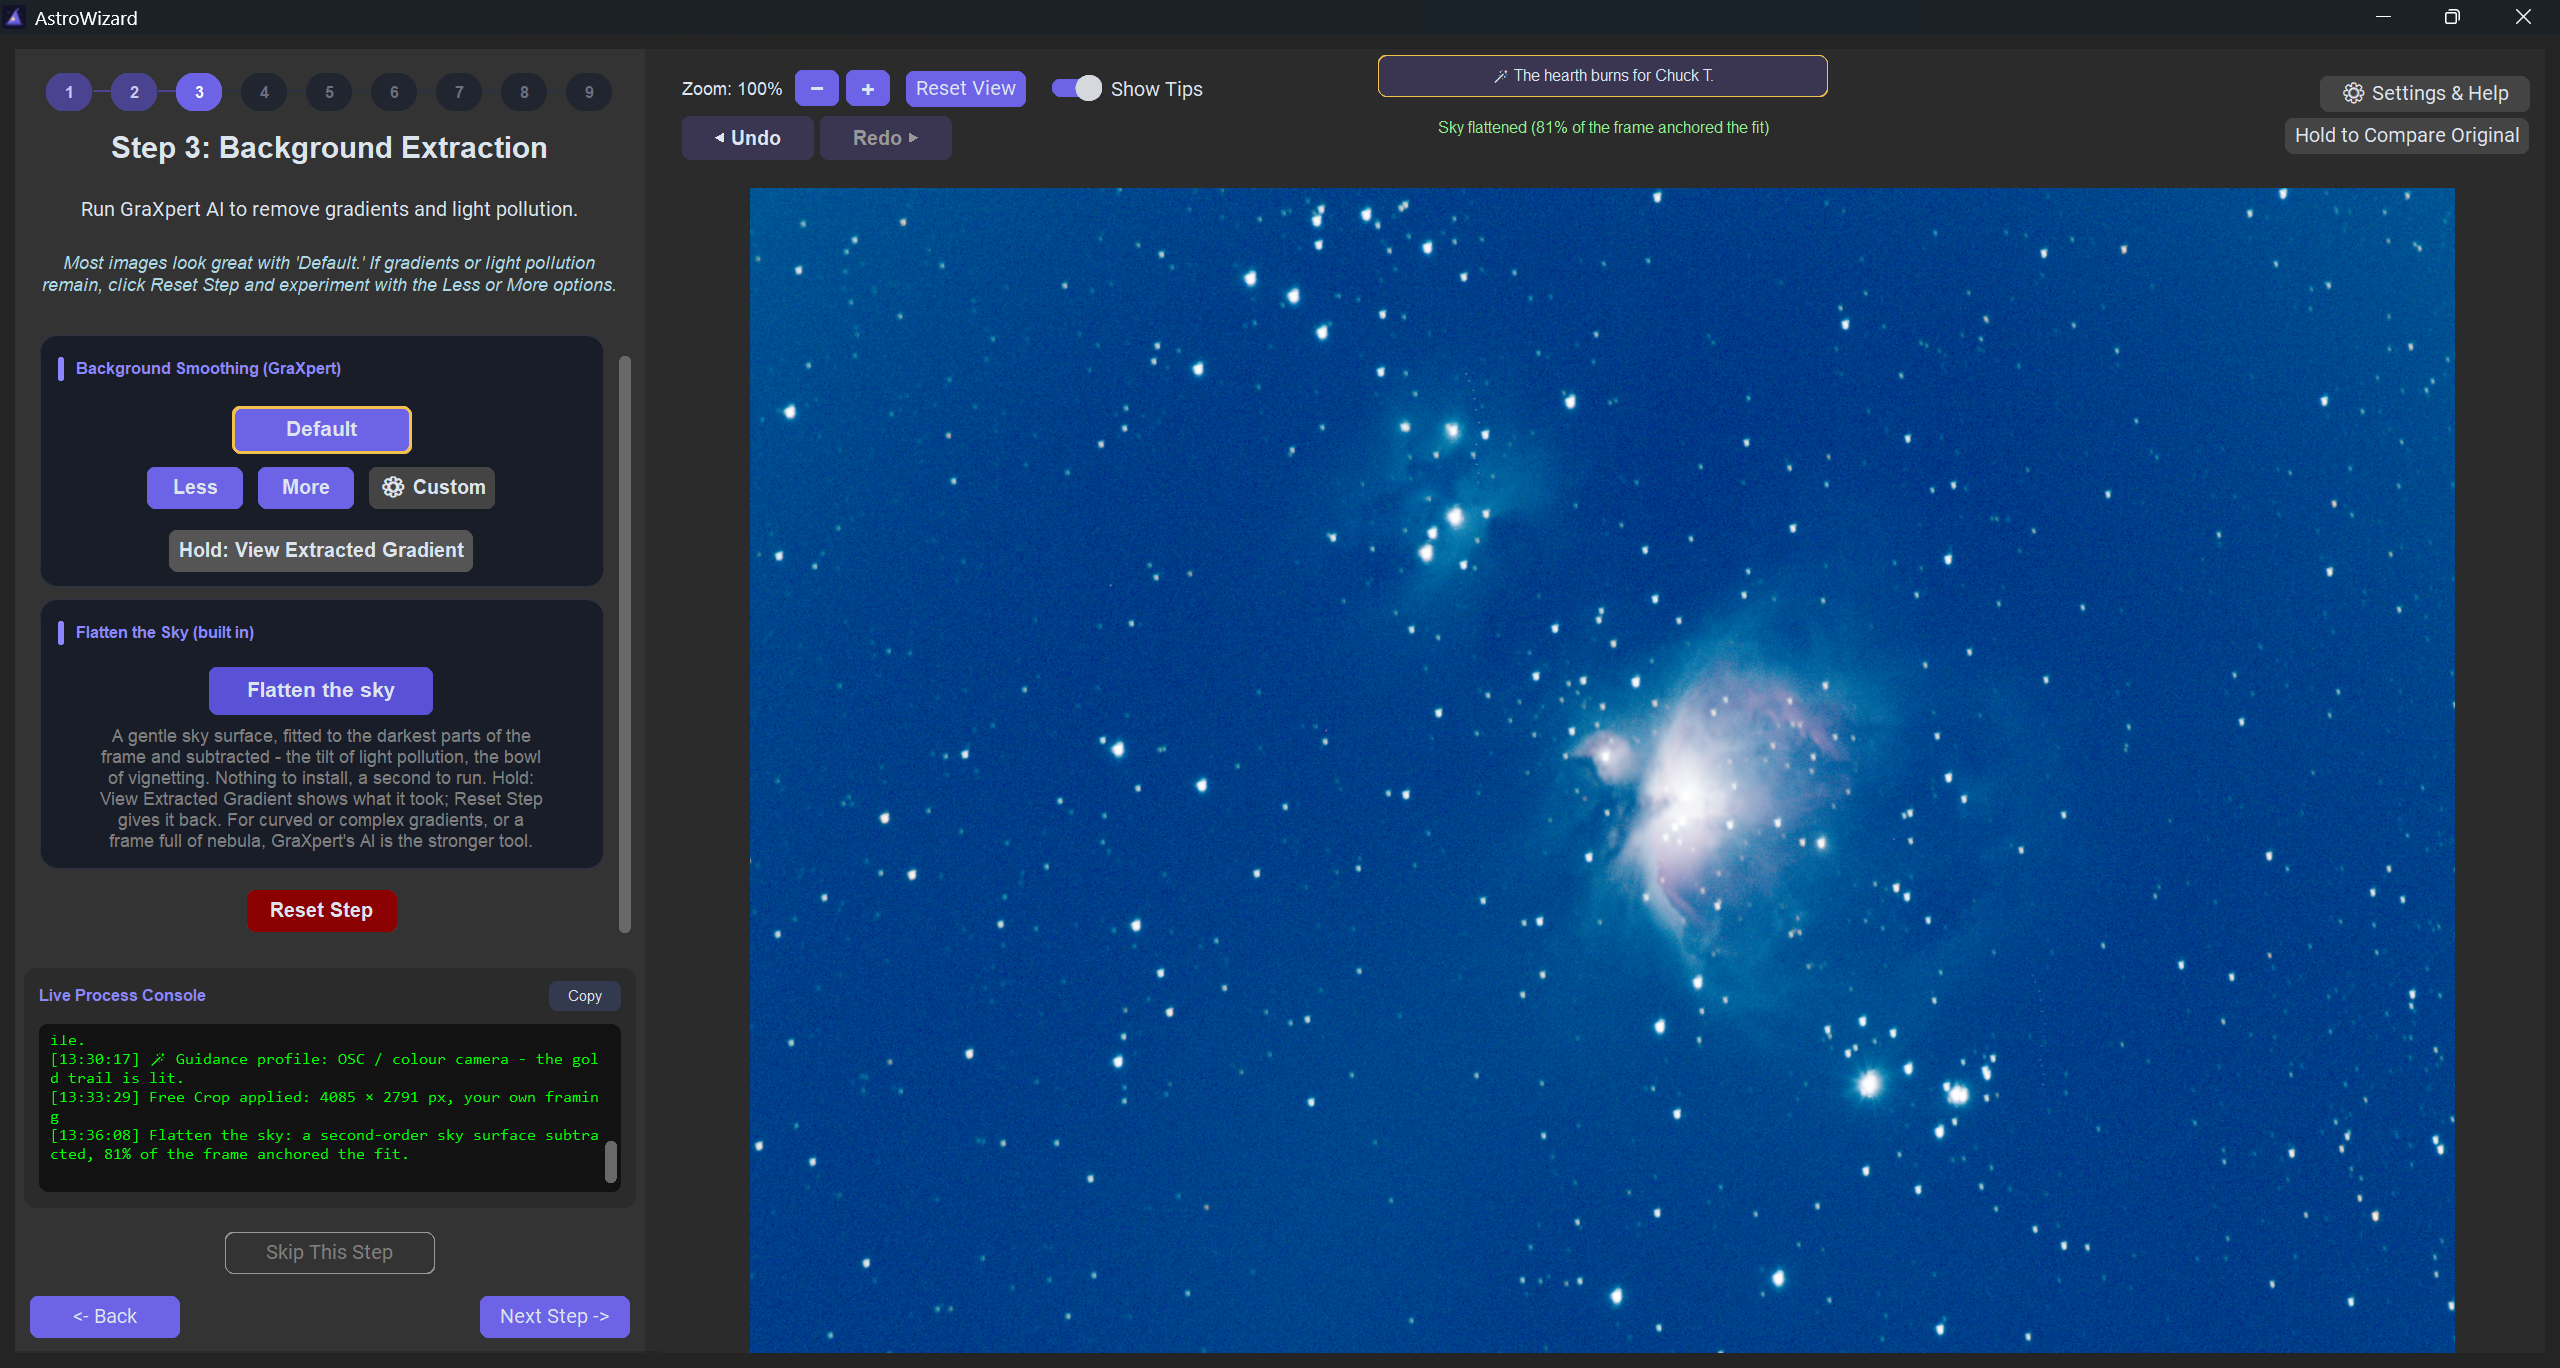
Remove light pollution/flatten the sky.
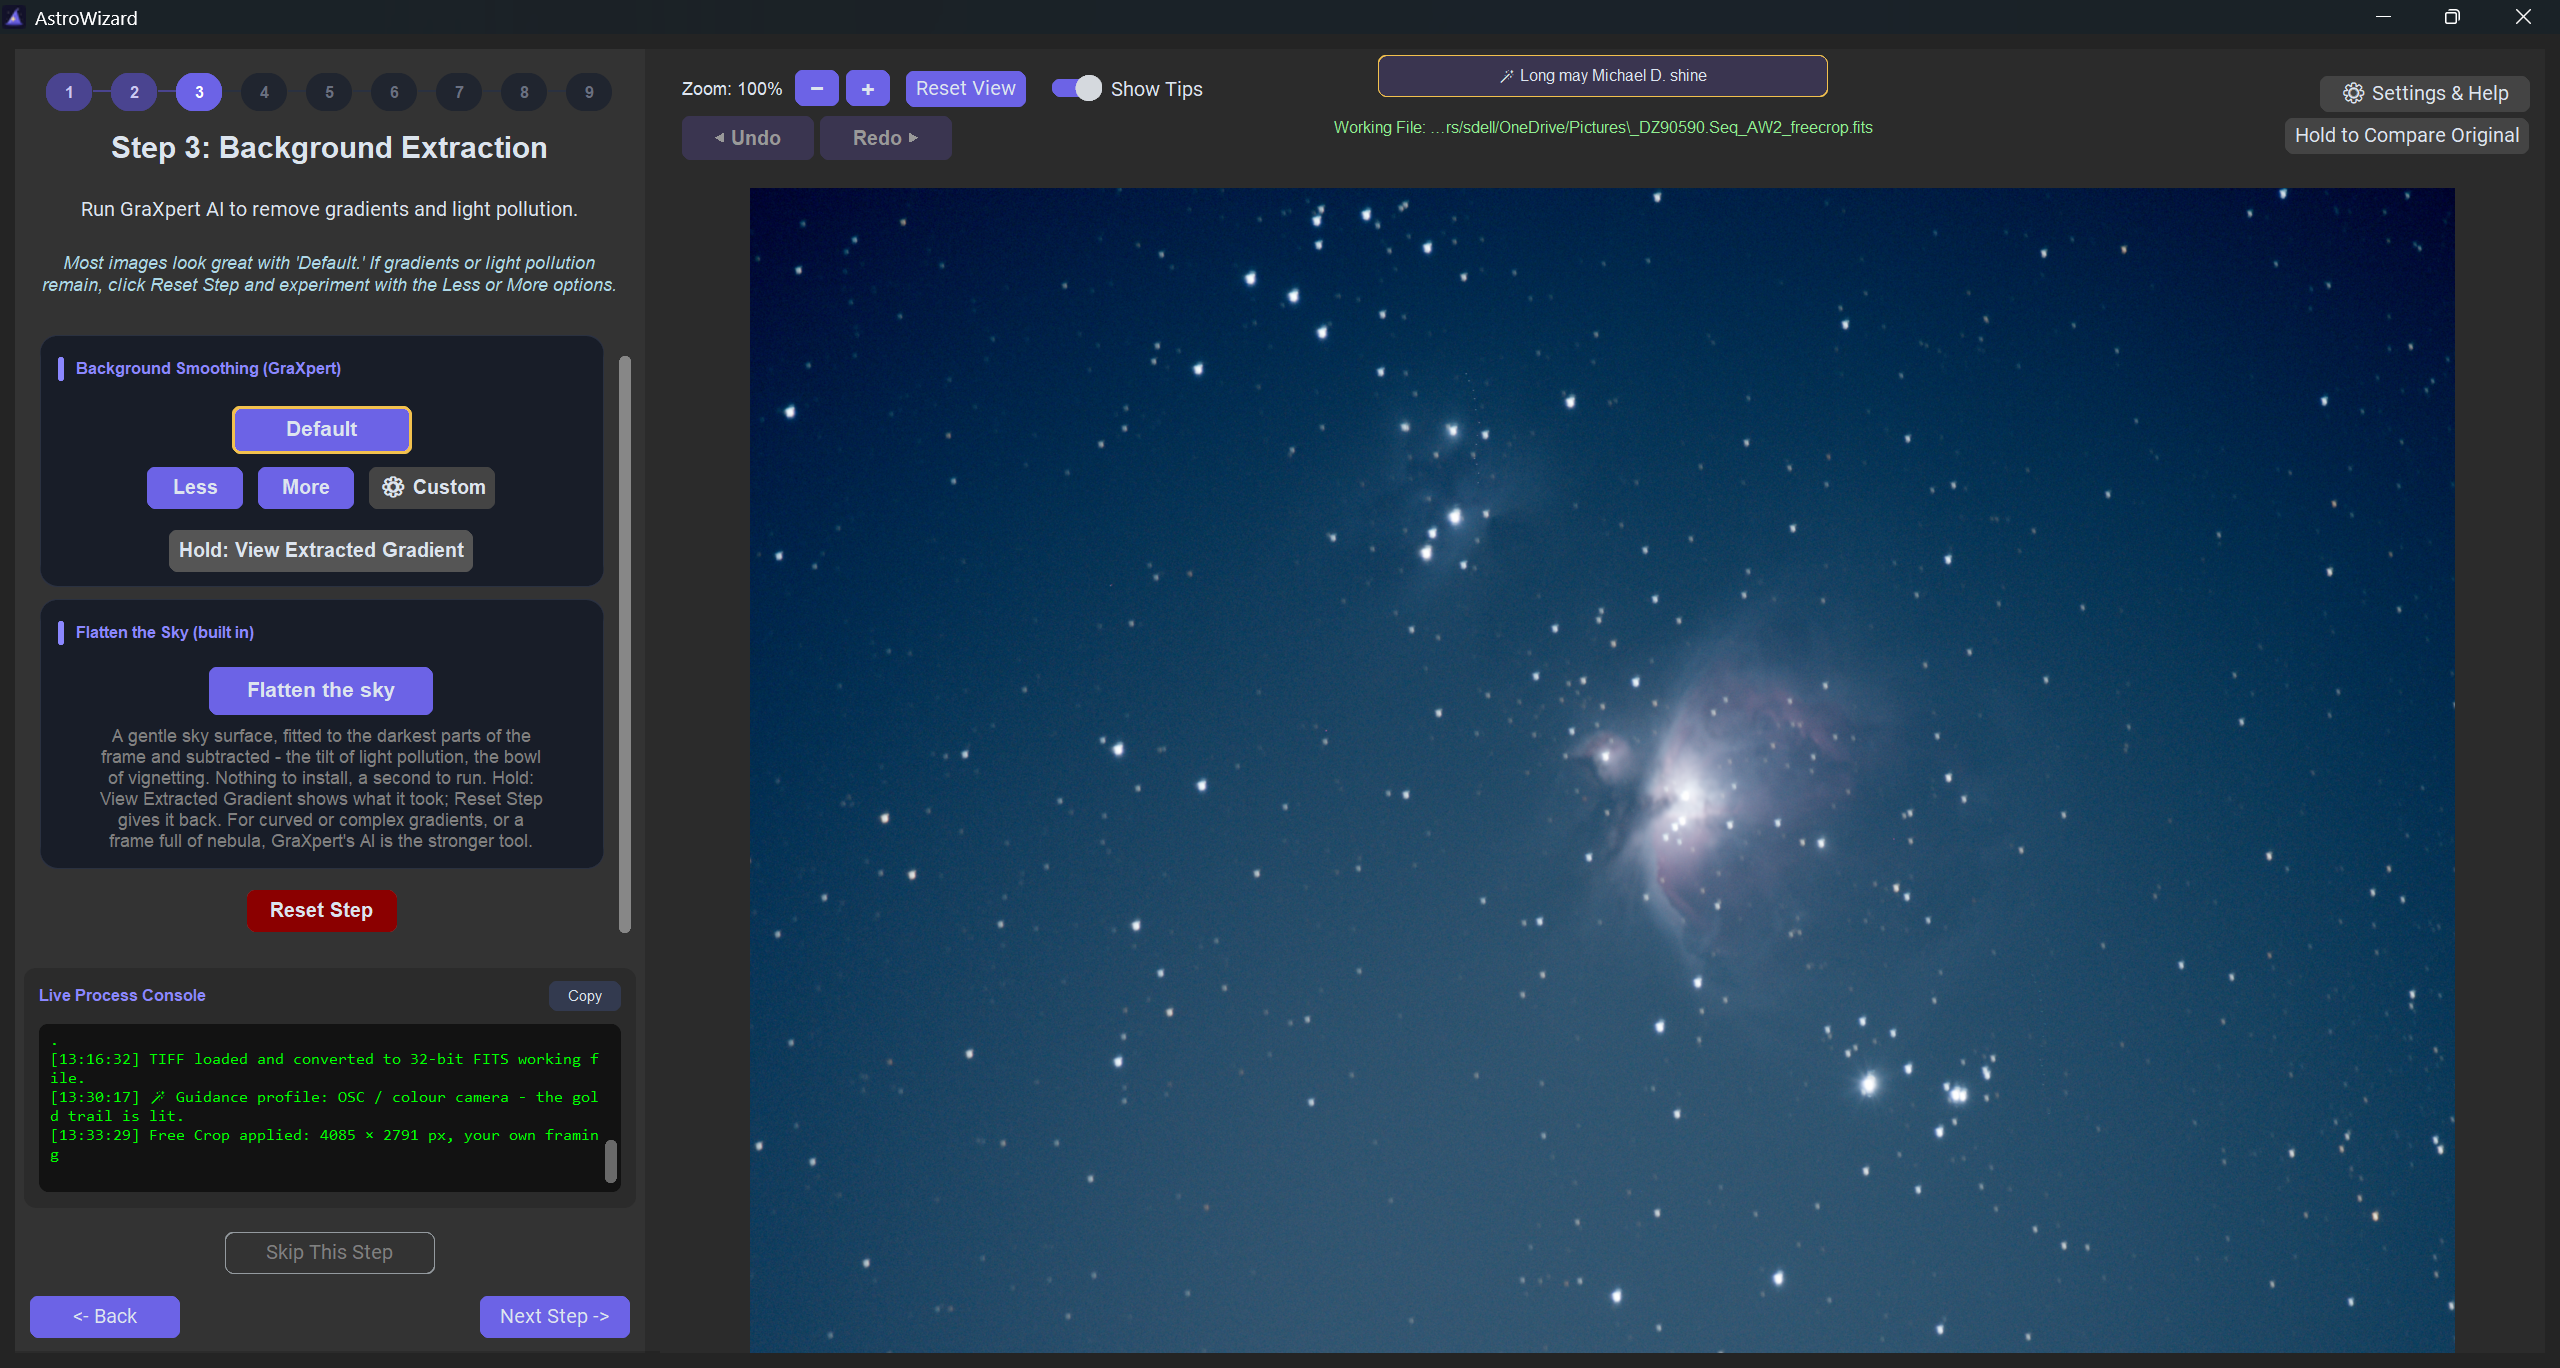
I chose Flatten the Sky. Yeah, it doesn’t look wonderful yet. Just wait.
Step 4 – Color Calibration
Run Background Neutralization.
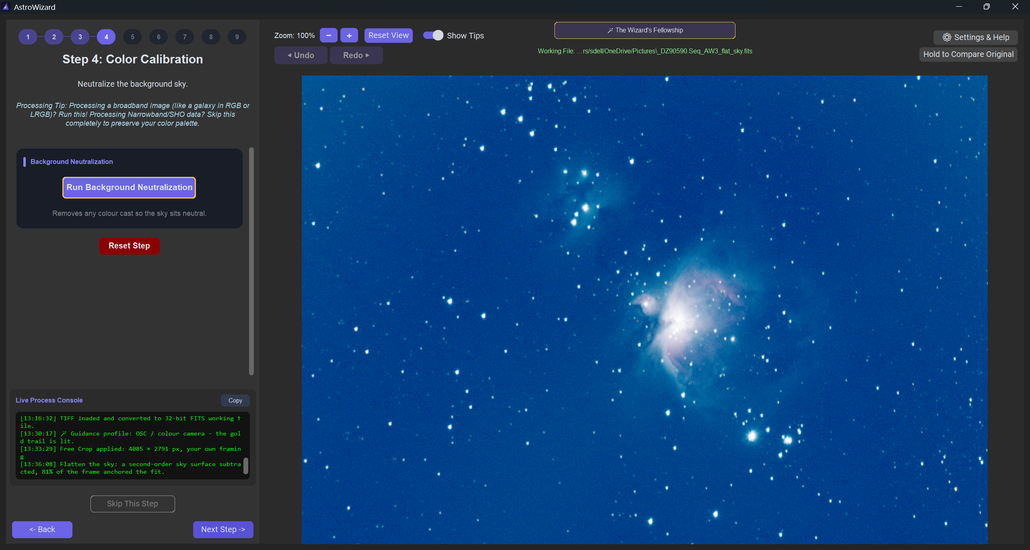
Magic starts becoming visible.
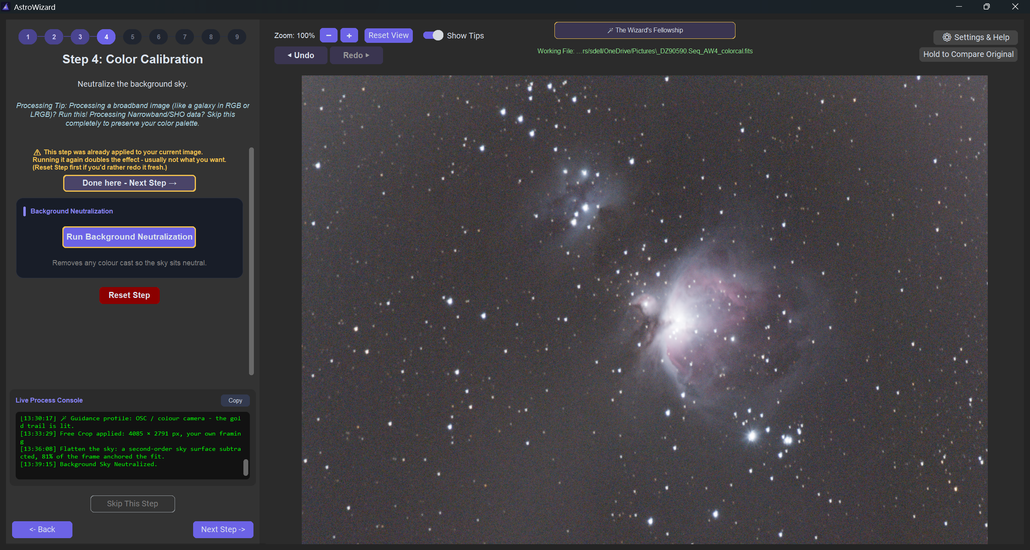
Click on “Next Step” or “Done Here – Next Step”.
Step 5 – Deconvolution & Sharpening
Since I installed the RC-Astro tools, I used the BlurXTerminator.
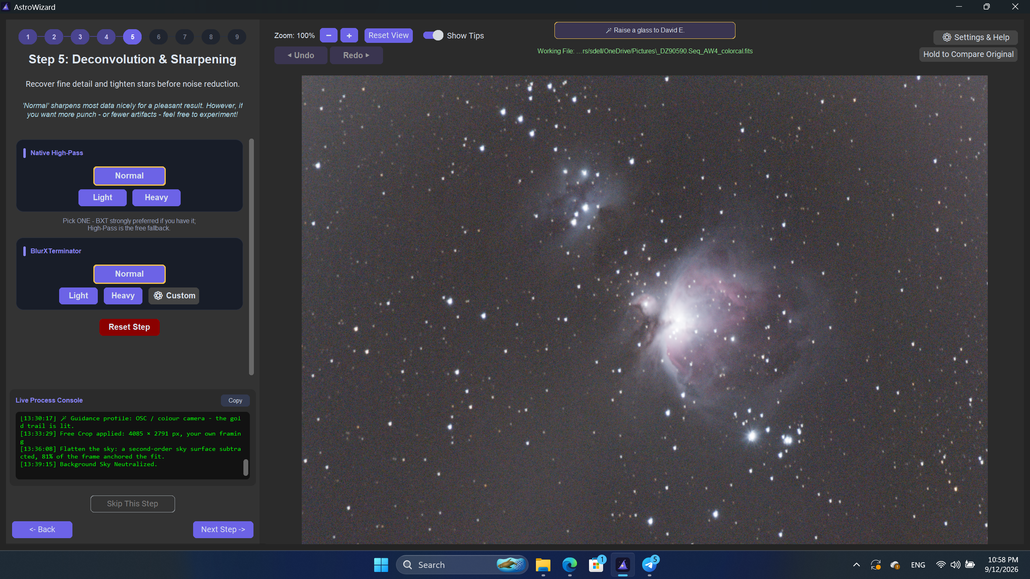
Clicking on Normal produced this.
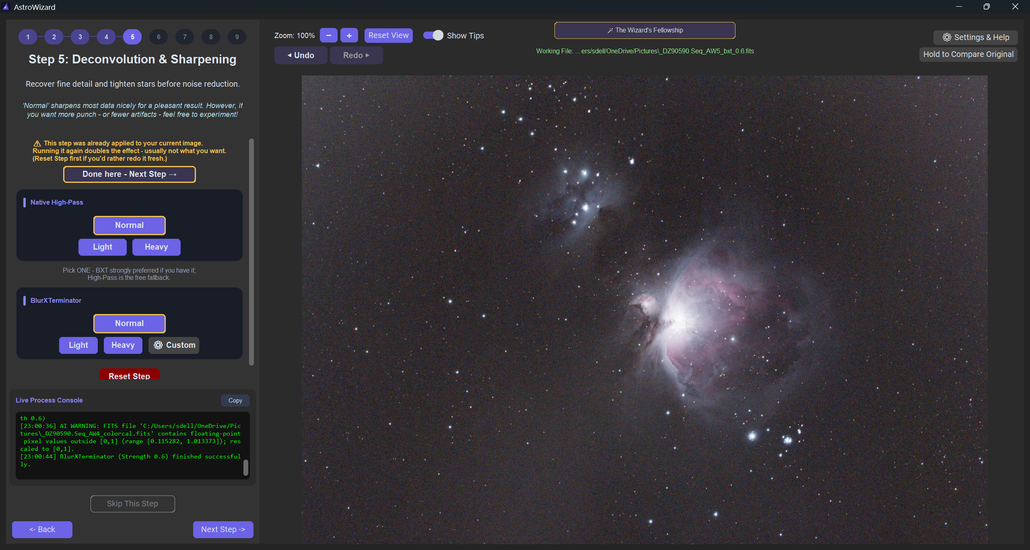
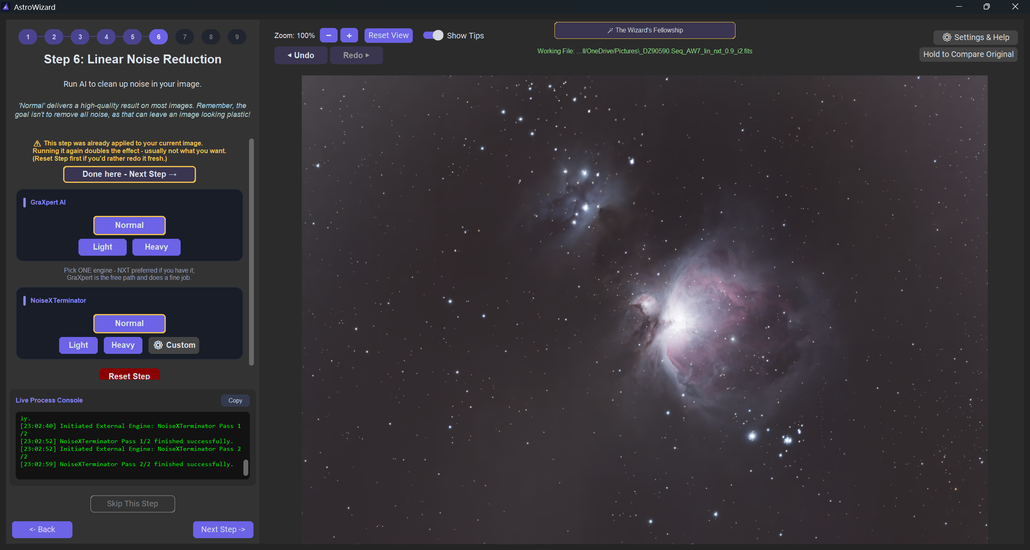
Step 6 – Linear Noise Reduction
Once again, I used the RC-Astro tool – NoiseXTerminator. It cleaned up the noise quite well.
Step 7 – The Big Stretch
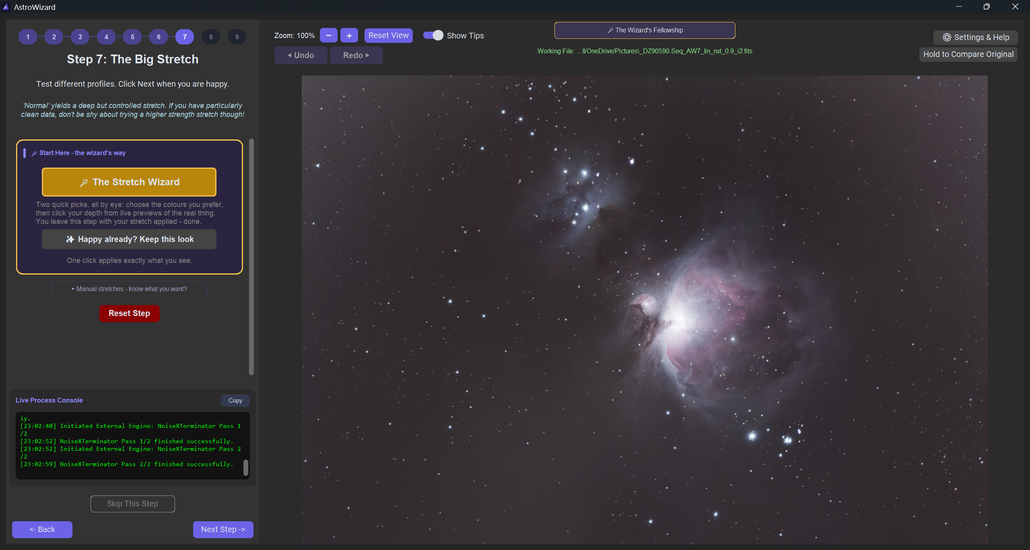
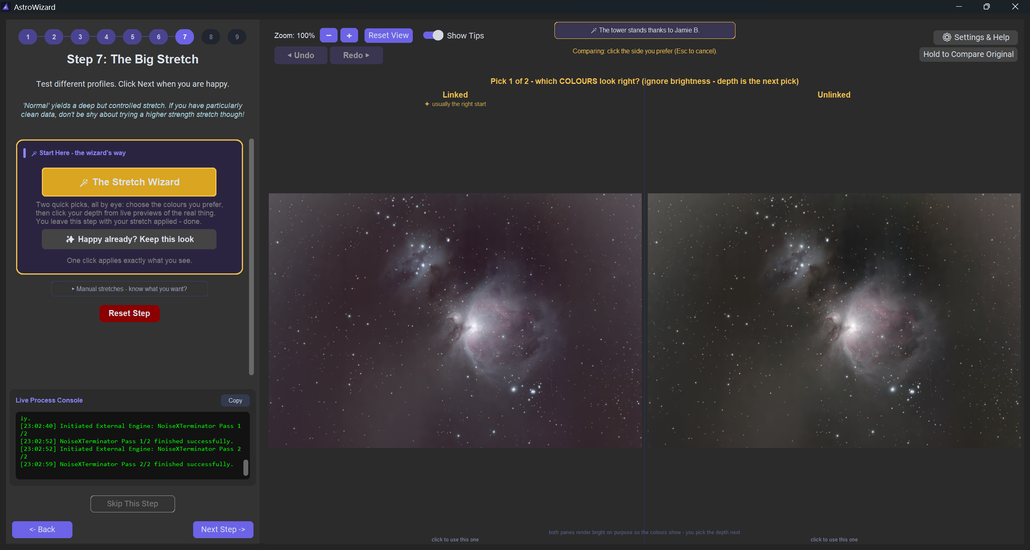
More magic applied. This generates a selection for choose from. Again, it guides you along. I chose the image on the right.
It now generated six images to select from.
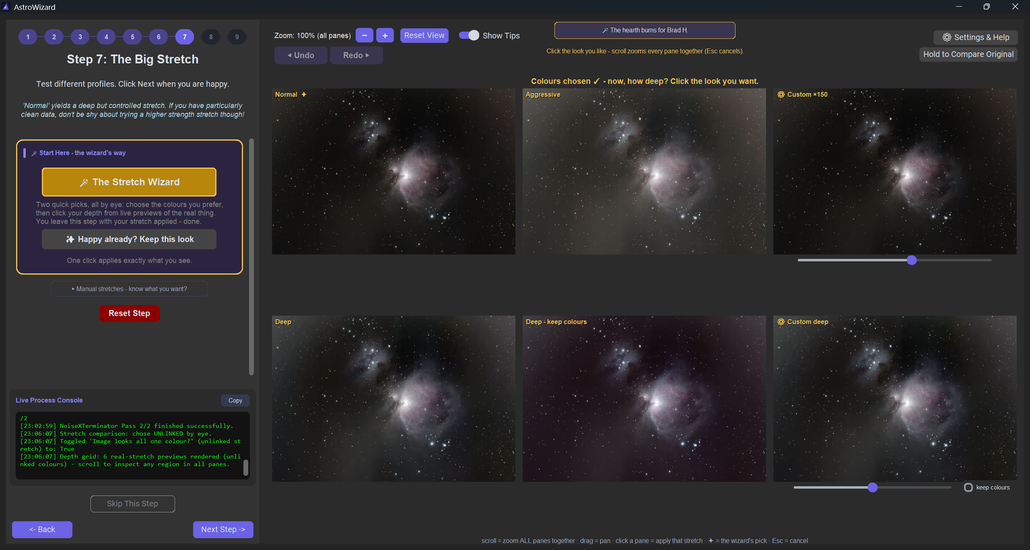
I chose the top right image because I liked it best.
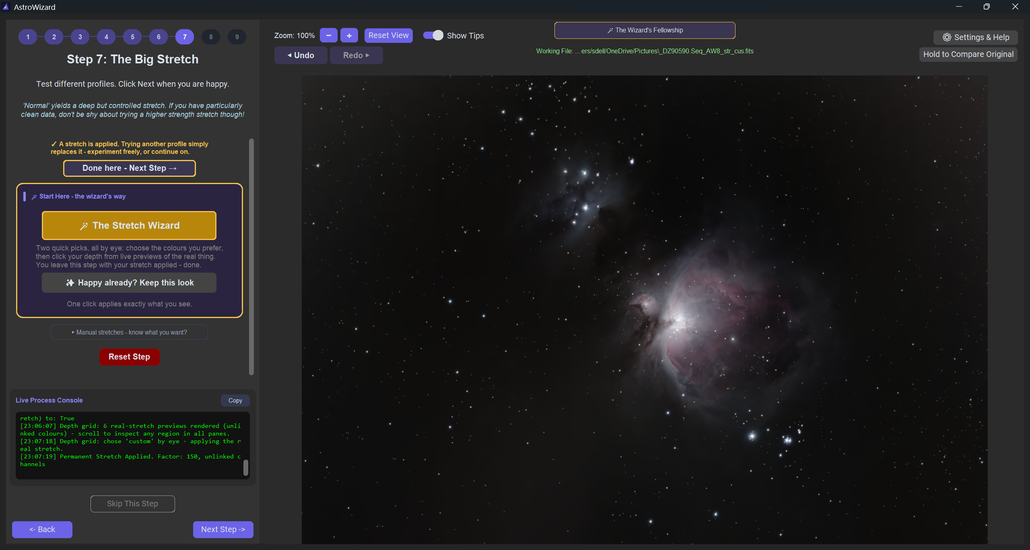
Step 8 – Final Polish
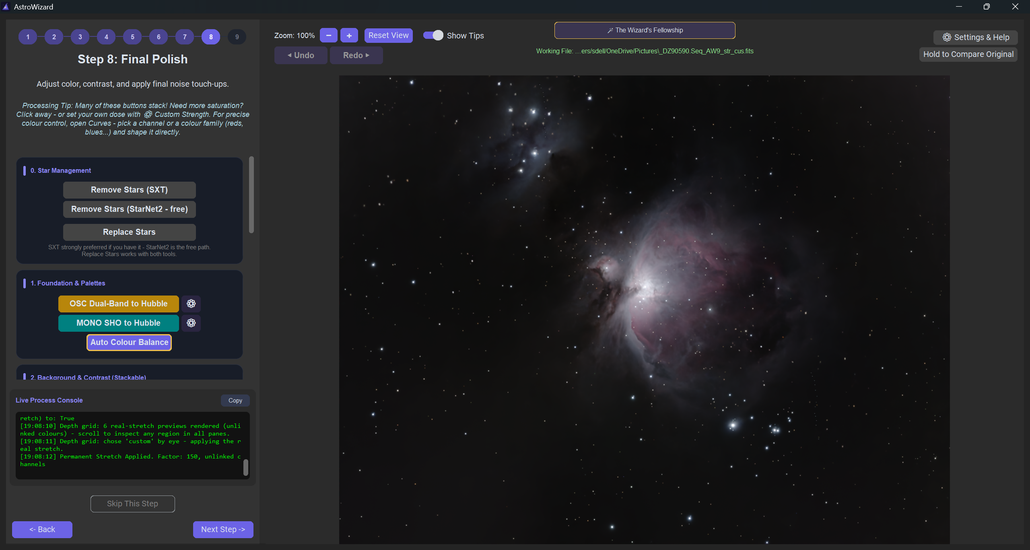
Here, further enhancements can be made.
I like removing the stars and adjusting the base image without affecting the stars.
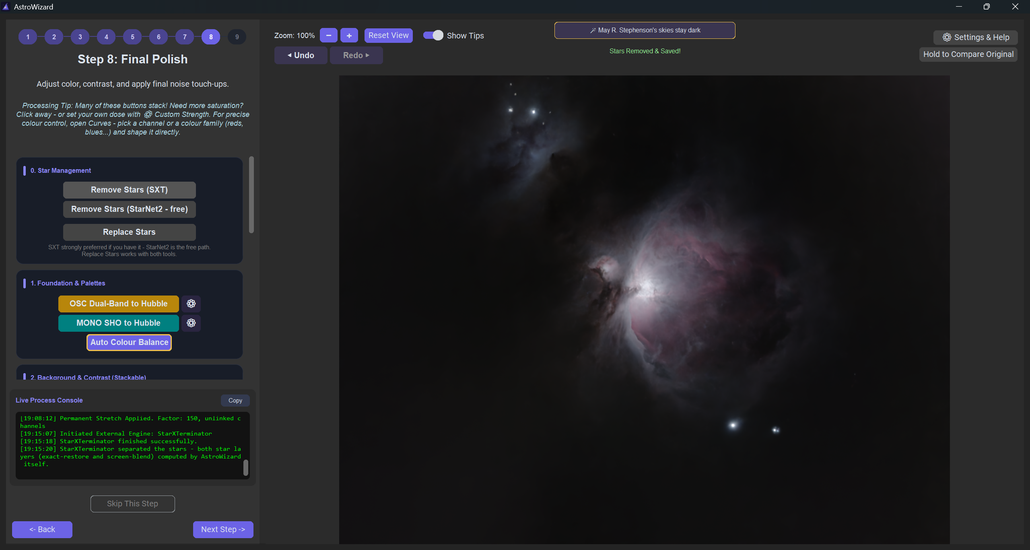
Now the stars are removed and more cleanup can be done.
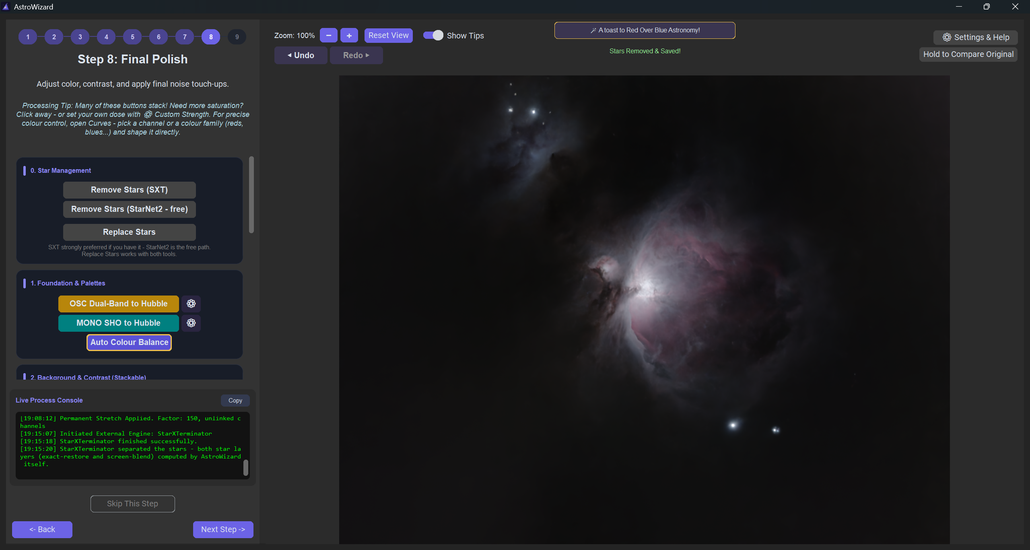
There are a variety of options to try. The beauty of AstroWizard is that each step can be reversed, so there is no worry of messing the image up. I applied “Make it Pop”.
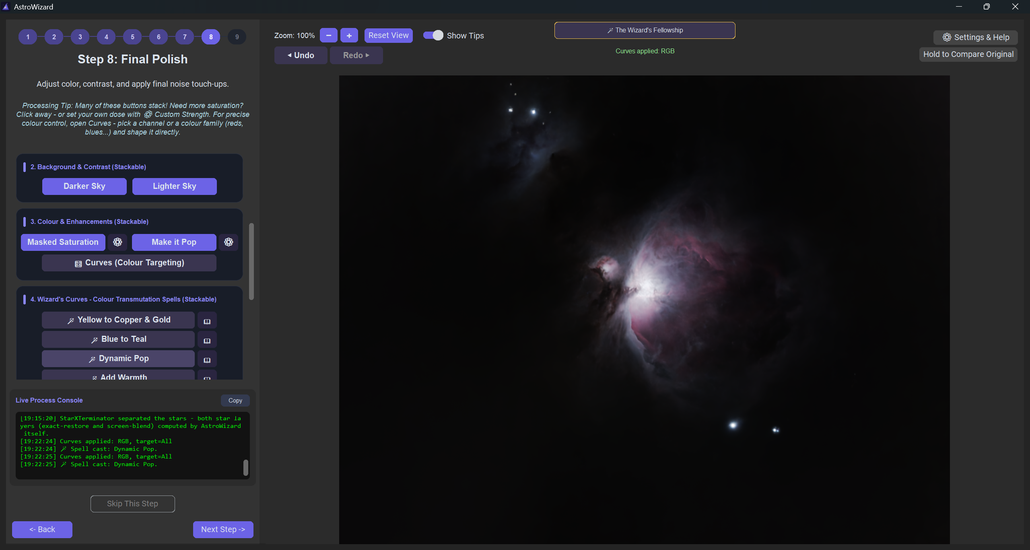
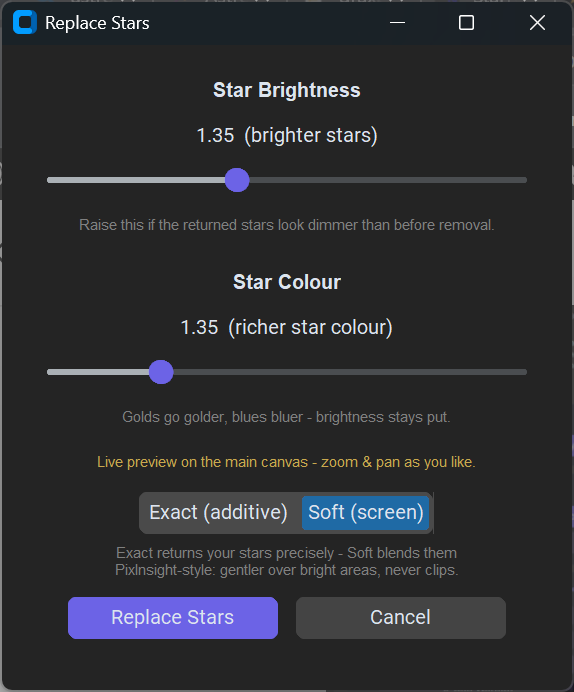
After you’re done adjusting the background, add back the stars.
The stars can be adjusted both in color and intensity. I like the soft(screen) stars.
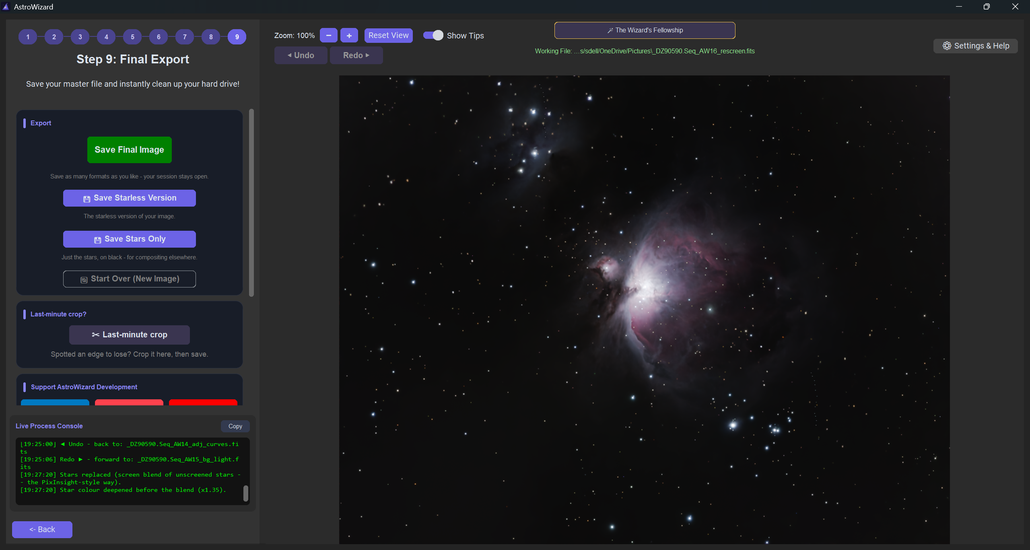
Step 9 – Final Export
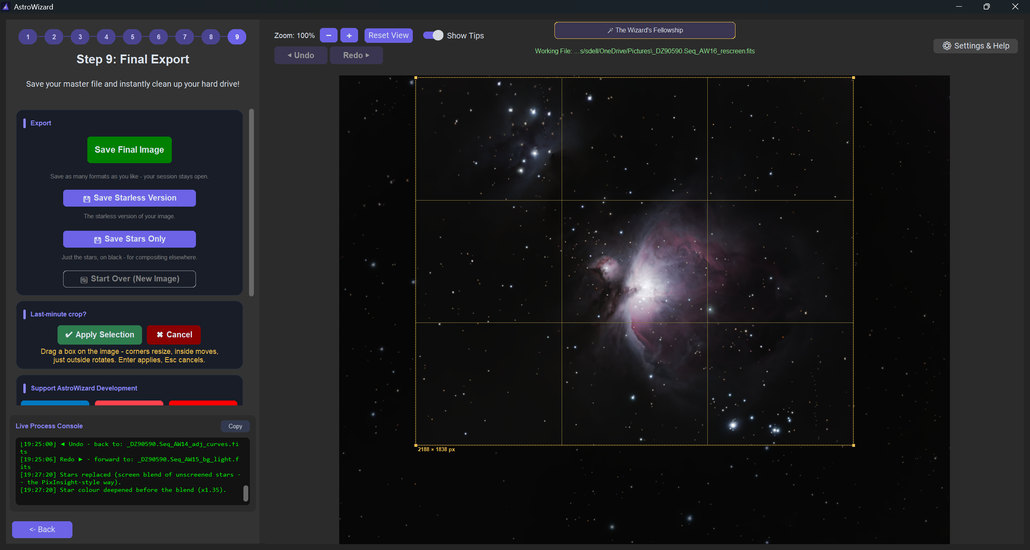
A final crop was applied.
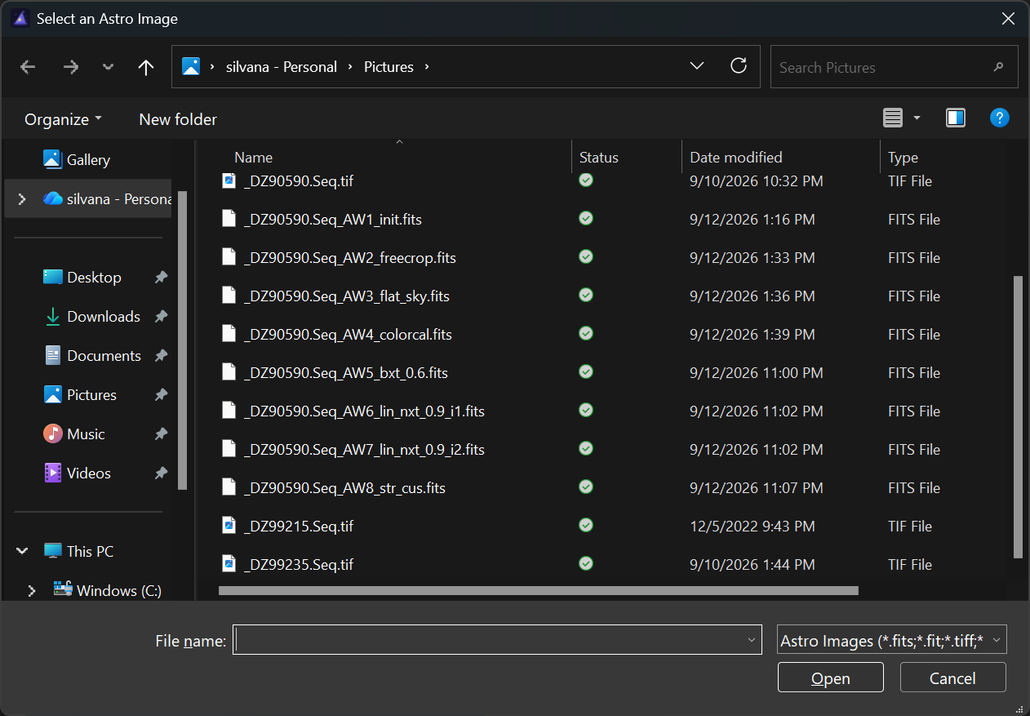
Save the image.
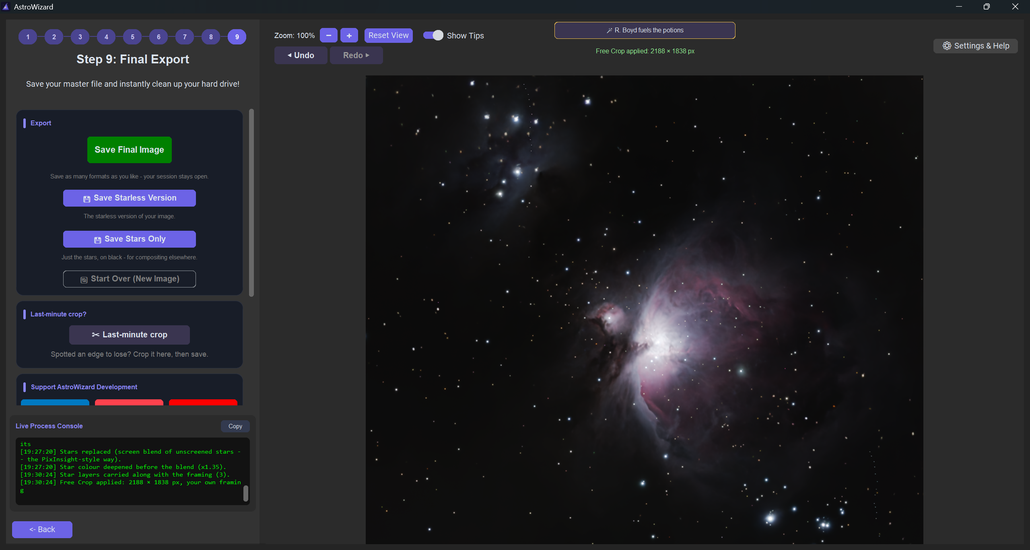
The application saves each step as a FITS file and they are in the same folder as the original stacked image.
Final Thoughts
This application is for all astro imagers, not just those beginning their journey in the art. Along with the ease of processing, a tutorial of concepts is a side benefit of using the application.
The goal of this post was to show how easy it is to process a stacked image just by taking the defaults, but it has much more power at each of the stages. It is THE tool that helps all astrophotographers.
The application is available for Windows, Mac, and Linux. Download the manual, available in English and German.
There is also a StackingWizard, currently in beta at this writing. Subscribe to Luke’s YouTube channel and view his in-depth tutorials.
A massive thanks to Luke for this brilliant application. It is empowering and has filled a massive void in the astro imaging world.
Have you had challenges with astrophotography? Let’s hear them in the comments.
© Silvana Della Camera
Night Shades – A Guide to Photography after Dark
Sights Beyond the Spectrum – An Infrared Photography Handbook
Master the Benro Polaris: The Ultimate Handbook for Photographers and Astrophotographers
To learn about upcoming workshops and tips on photography, consider subscribing to my website.
Taking photos and want to make them more compelling?
Art isn’t just for walls. Art is also to hold in one’s hands.
 Silvana Della Camera
 Silvana Della Camera

 Silvana Della Camera






Leave a Reply
Want to join the discussion?Feel free to contribute!